boots

boots
Farming Family
Showing posts with label Recipes. Show all posts

Wednesday, November 16, 2016

Chicken Soup For The Toddler's Cold

The two little guys were sick with a cold yesterday. All around grouchy, clingy and whiny. I made them chicken soup. But they weren't up for eating much at all. They had some bananas, a little egg and bacon and that is pretty much it. Plus I gave them all the cut juice and milk they wanted. When they weren't whining, they were sleeping. Big Boy rested on the couch for a while watching his favorite show, Chuggington. Little Boy napped upstairs for a short while. Then they both fell asleep mid afternoon. Early evening they awoke for a little snack (thin slices of Darlin's apple spice birthday cake) and went back to bed at 7.  I hope they are up for eating more today, and that they feel better. Poor babies. Why do the little guys get colds much worse than adults, especially when there seems to be no cold medications for little guys? Sigh. Hopefully we all get over this soon. I've had a cold for going on four weeks now.


Here is the start of the chicken soup. This is my Germa's chicken soup pot. She made many a good chicken soup in this pot. I remember going to the grocery store with her when we would visit her or she and Poppop would come to Maine. She would be dressed up in a shawl, knitted hat with a pompom on top, clip on earrings and bright pink lipstick. She would go whistling up and down every aisle, the aroma of Emeraude wafting behind her. When we would get to the meat department she would say "We need an old, fat hen for our soup, Becky." And we would paw through the chickens, looking for an "old, fat hen." I didn't have the heart to tell her that most of the chickens in the grocery stores now are 8 week old cross rock meat birds. She told me that what can make or break your soup is the fat. "Fat is flavor, and a preservative." She'd say. Thus, the reason for an "old, fat hen". And I'd have to agree. 
 This chicken wasn't very fat, so I added a few tablespoons of leftover bacon grease from that morning's breakfast...mmm!
 First I put in my chicken, two small, chopped onions, a few cloves of minced garlic, and some thinly sliced celery with two quarts of water. I added some sea salt and black pepper and two small bay leaves and let it all simmer for a couple hours. Next I took the chicken out, and once cool enough to handle I took the meat off the legs, wings and back and diced it, putting it back into the soup. Then I added some diced carrots from our garden that I'd blanched and froze earlier, and some sliced mushrooms, rosemary and thyme, and two diced potatoes. That simmered for another hour or so. Mmm!

Big Boy, snuggled up on the couch watching Chuggington.

Yesterday was pretty much all about sniffles and crankies. Hopefully today things go a little better. 
Hope you have a great day today!!

Wednesday, June 22, 2016

~Grilled Chicken Pesto Sandwiches~

Grilled Chicken Pesto Sandwiches

I got this recipe from a You-Tuber I occasionally watch. Her name is Jen and this is her channel: How Jen Does It She did a video on how she cooks it and everything, you should check her out if you have time.

Marinade: 4 boneless, skinless chicken breasts
2-1/2 TB olive oil
2 tsp. balsamic vinegar
1-1/2 tsp. each of oregano, basil, garlic powder
1 tsp. dried parsley
fresh ground pepper
salt
Mix all together. Poke holes in chicken with a fork, pour marinade over chicken. Refrigerate at least one hour. I let mine "chill out" for about 3 hours.

  
Pesto:
2 cloves garlic
2 handfuls fresh parsley
1 handful fresh basil
1/3 cup Parmesan cheese (I used freshly grated)
1/2 tsp salt, 4 TB olive oil
Throw everything in your food processor until blended smooth. Add more oil if needed. Test taste for garlic, add more if needed.


Grill chicken*. After turning, when chicken is just about done, place provolone on top to melt.


Toast rolls and brush with butter, sprinkle lightly with garlic salt.


Slather your pesto on there, throw on some thinly sliced red onion, tomato and some crispy Romaine lettuce.


Pour yourself a glass of sweet tea and enjoy this flavorful, colorful goodness!

*Let your chicken sit out a few minutes before grilling. Throwing fridge-cold meat into a hot skillet could make your meat tough.


Printer friendly version:

Grilled Chicken Pesto Sandwiches

Marinade: 4 boneless, skinless chicken breasts
2-1/2 TB olive oil
2 tsp. balsamic vinegar
1-1/2 tsp. each of oregano, basil, garlic powder
1 tsp. dried parsley
fresh ground pepper
salt
Mix all together. Poke holes in chicken with a fork, pour marinade over chicken. Refrigerate at least one hour. I let mine "chill out" for about 3 hours.

Pesto:
2 cloves garlic
2 handfuls fresh parsley
1 handful fresh basil
1/3 cup Parmesan cheese (I used freshly grated)
1/2 tsp salt, 4 TB olive oil
Throw everything in your food processor until blended smooth. Add more oil if needed. Test taste for garlic, add more if needed.

Grill chicken*. After turning, when chicken is just about done, place provolone on top to melt.
Toast rolls and brush with butter, sprinkle lightly with garlic salt.
Slather your pesto on there, throw on some thinly sliced red onion, tomato and some crispy Romaine lettuce.
*Let your chicken sit out a few minutes before grilling. Throwing fridge-cold meat into a hot skillet could make your meat tough.

Monday, April 18, 2016

~Homemade Hamburger Helper~

Before we get to the recipe, I just want to say that the weather has been so awesome lately. To the point where I was almost surprised to see skeeters in Wytopitlock last night! I can't believe I almost forgot about the pesky li'l' buggers. Ok, now I'll show you the goods.


Homemade Hamburger Helper

1lb ground beef or turkey (you can use just 1/2)
1/2 C diced onions 
1 TBS butter, optional
2 C milk
1 C cold water
2 C elbow macaroni, uncooked (I used ruffles, 'cause that's what was in the cupboard ;))
1/2 tsp sugar
1 tsp salt or seasoned salt
1/4 tsp black pepper
3/4 tsp oregano
3/4 tsp parsley
1/2 tsp chili powder
1 tsp paprika
2 C shredded cheddar cheese*
  1.  Brown meat in a skillet over medium heat 'till almost done
  2. Add onions and cook 'till tender
  3. Drain on paper towels and return to skillet
  4. Add remaining ingredients except cheese
  5. Stir to combine
  6. Bring to a boil
  7. Reduce heat, cover and cook pasta a bout 9-10 minutes (stirring occasionally) 
  8. Remove from heat and add cheese
  9. Let sit a couple minutes. If sauce is a little thin, it will thicken now. 
  10. Serve and enjoy!
*I did not have shredded cheddar, but I had a small can of cheddar soup so I used that and a handful of shredded mozzarella and it still came out great! It tastes just like the real deal! I love one-skillet recipes. This would be good with some veggies or with a garden fresh salad. Even the boys loved it. I cannot remember the site I got the recipe from, but it says the author is Divas Can Cook, lol. So, thank you DCC for the awesome recipe.

Saturday, February 27, 2016

Kettle Corn

I tried homemade kettle corn the other day, and it was delicious! I love kettle corn, cheddar corn, just about any kind of popcorn! I found this yummy recipe here: http://allrecipes.com/recipe/20808/kettle-corn/
  It says if you use brown sugar, it will taste like caramel corn, if you use white sugar, it will taste like popcorn balls. I tried it with white sugar.

1/4 cup oil
1/4 cup sugar
1/2 cup kernels *I would try a little less kernels next time, because I had a lot of unpopped kernels in the bowl and if you cook it too long the sugar will caramelize and burn. This could be because of pot size. My popcorn pot may be smaller than most, and so I would need fewer kernels. A good rule of thumb my Dad taught me was "just enough kernels to cover the bottom." Also, this recipe didn't call for salt. To get the real "kettle corn" taste, you will want to add a little salt. Some people like to add it with the sugar, others sprinkle it over the popcorn when it is done. I sprinkled it over the popped popcorn. Next time I may try mixing it in.

Heat oil in pot on medium-high and add 2-3 kernels. When they pop, add sugar and stir it in well. Add remaining kernels. Put lid on and constantly shake and swirl pot around to keep the sugar from burning while the corn pops. When you can count about 3-4 seconds in between pops immediately dump into a bowl and stir it all around real good to mix the sugar before it hardens. Sprinkle on salt and enjoy! This stuff is good! I almost ate a whole bowl of it myself! The boys love it too!


Thursday, February 4, 2016

Simple Irish Soda Bread

I found this recipe somewhere on the internet, and we all like it (even Little Boy) so I thought I'd share:


2 C flour
1 C butter milk (or 1 C milk + 1 tsp vinegar)
1/2 tsp baking soda
1/2 tsp salt
1/4 C sugar (optional)

If using vinegar and milk, combine and let curdle. Grease an iron skillet (I used a 10") and preheat oven to 400*. Combine dry ingredients, add milk and stir together. Dough will be sticky. Turn out on floured surface and coat in just enough flour so it can be handled without sticking to your hands- you don't want to knead it. Press into skillet so it is disc shaped. Score with a knife. Bake 15 minutes. Enjoy!
 

 This is so simple, easier than biscuits and it is quick. Serve with any meal, it is good toasted as well (pan toasted). You can experiment with your own ingredients like raisins,seeds, herbs, just about 
anything.  


Wednesday, January 27, 2016

Homemade Bunny Milk

This is a recipe for homemade Nesquik powder I recently tried and thought I'd share with you, it is so simple:

1/3 C Cocoa Powder
2/3 C Granulated Sugar
Pinch of Salt (optional)

Stir together and keep in a pint Mason jar. I tripled it and keep it in a qt. sized jar, and omitted the salt. Big Boy loves it! It is cheaper than the name brand mix and you probably already have the ingredients on hand. Plus, you know just what is in the mix, no funny-named ingredients or preservatives.

*Important*~ To make a glass, you will first need to put about 2 TBSP. of hot tap water into your glass, stir in the mix until it dissolves, then add the milk. We use whole milk, and it does not taste "watery". But the cocoa powder will not mix well with cold milk, so if you skip this step, you will most likely be disappointed.

Hope you enjoy!

Thursday, January 22, 2015

Home Grown Roasted Chicken

Thaw chicken and rub all over with olive oil.
 Heat skillet on stove top, grease with a little olive oil. Rub chicken liberally with coarse sea salt and fresh cracked pepper.
 Sear chicken, presentation side down (breast side down) 'till golden. Sear other side. Searing the chicken before roasting caramelizes the natural sugars in the skin and meat, bringing out a delicious flavor. I learned this from a youtube video, and have roasted my chickens this way ever since, it really makes a difference in flavor!
Keep a nice hot fire going so the oven temp doesn't drop in the middle of roasting your bird. "Biscuit" wood works great for heating up your oven (small, round, seasoned wood). Juniper burns really hot, too hot for my preference to burn it alone. But mixing it with hardwoods seems to work well. I'm still experimenting with different types of wood.
Roast the bird at about 350*-400*. At one point the temp dropped to 300*, I just added more wood and brought it back up, it didn't seem to bother it any.
For about the last half hour, I placed a sheet of aluminum foil on top to keep it from burning before it finished. Also, I kept moving the pan around, closer or farther away from the firebox and the back of the oven as needed.
Take chicken out when nicely golden and meat thermometer reads 155*, as it will reach 165* while it is resting. I usually check in the breast and thigh.
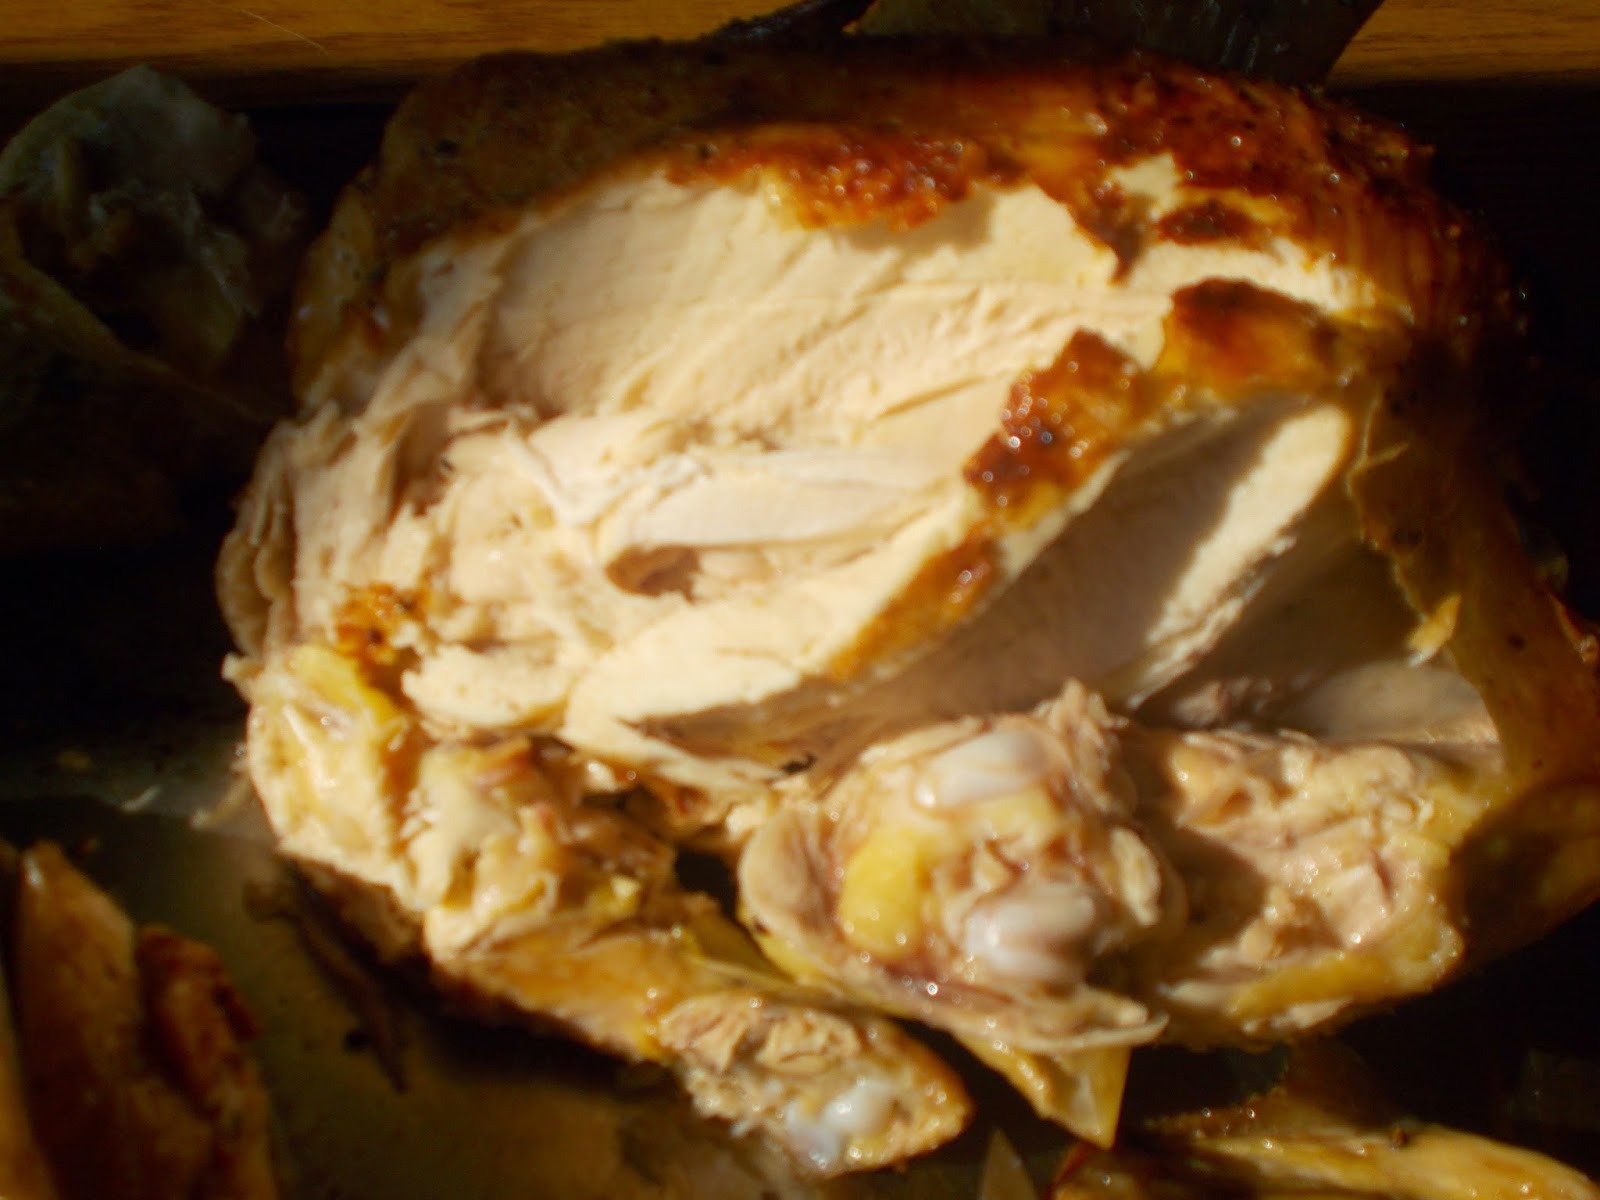
Moist, juicy and flavorful! Mmmm!
I tried to capture how it looks after cooking it this way, but the pictures don't do it justice ;-)
I added flour and water to the drippings, and made gravy for the rest of the week. There was enough salt and pepper in the drippings that I didn't need to add any spices. After picking over the chicken, there is plenty for Darlin to take sandwiches to work in the woods all week and some for a few meals besides. :)
I am really enjoying trying out different dishes in the cookstove. This is the first time I roasted a chicken with it. I must say though, I think I know a couple reasons why Caroline Ingalls baked one day a week: You have to tend the fire every so often, and check the food frequently. And you have to have a HOT fire going to heat the oven, which really heats up the kitchen! I can't imagine what it would be like in the Summer!
   I do wish the stove top didn't always look icky when I snap pics while cooking. But as the surface gets hot, it burns off the nice, shiny coat of shortening I put on it, and then there are the unavoidable grease splatters! So after it cools to a gentle warm temp in the evenings, I grease it again like I do with my fry pans before I put them away (only I grease those with olive oil, shortening in my food or pans creeps me out, yuck!) Yup, I'm an odd one ;-)

Wednesday, September 17, 2014

Chicken Enchiladas


8 flour tortillas
3 boneless, skinless chicken breasts
1 16oz container sour cream
1 10oz can cream of mushroom soup
1 10oz can cream of chicken soup
1 small can green chilies (chopped)
1 small onion (diced)
1 8oz pkg. shredded Cheddar cheese
1 8oz pkg. shredded Colby-Monterey Jack cheese

Preheat oven to 375*. Boil chicken breasts and allow to cool, at least to room temp. In a large bowl mix sour cream and soups. Take 1/4 of mixture and set aside. Add to large bowl onion, chilies, and cheddar. Shred or cube chicken and add to large bowl. Place about 1/2 C. of mixture on middle of tortillas and roll up. Place in a glass pan. Cover with the mixture that was set aside, coating all the edges. Sprinkle the top with the Colby-Monterey Jack. Bake for about 30 minutes, until cheese is golden.


* The picture was taken the day after I made these. They look better fresh, I just forgot to get a picture. Also, I made three pans of them (for company) but only had two glass ones. If you bake these in a metal pan, the bottoms of the tortillas will be tough and chewy, at least mine were. :)

Tuesday, September 16, 2014

Homemade Macaroni and Cheese

I've adapted this cheesy recipe from one given to me on my 14th birthday. It is creamy and cheesy, sure to be a hit with the family.

 1/2 lb. macaroni, cooked. (we currently like small shells)
4 T flour
3/4 tsp salt
1/2-3/4 lb shredded cheddar cheese
2 tsp worcestershire
4 T butter
3 cups milk
1/4 tsp fresh ground pepper

*Cook pasta. Melt butter in a pot, stir in flour, salt and pepper. Slowly add milk, stirring until it thickens. Add cheese, stir until melted and blended well. Add worcestershire sauce. Pour over pasta, mix together and serve. A few strips of bacon makes a nice addition. Fry and drain before adding to macaroni. Makes enough for 2 (and a half, lol) people with enough leftovers for another meal.

Saturday, August 23, 2014

Meal Plan Review

***********READ THIS POST IN ITS ENTIRETY BEFORE  DUPLICATING FOR
YOURSELF***********   I don't want any hate comments, don't say I didn't warn you...Lol

On my quest for better meal/food/money/sanity management, I thought I'd look on *interest (yes, it is now considered a swear word in our house!) for some fresh ideas. He,he. If only I could go back and tell that poor, little, unsuspecting me what lay ahead. I came across this woman's post/pin: http://thecreativemama.com/?s=menu+board
  All fine and dandy. I thought "Gee, I could make that. It doesn't look too complicated." *snicker*
I bought a frame. I bought lovely colored paper and stickers from the craft store (which, by the way, is about 65-70 MILES away from my home!) Over the span of about one week, I jotted down recipes I wanted to use, where to find them, what category they belonged in and then color coded them. Then, I had to figure out how to make the menu cards on the computer. Glued the fronts and backs together, ''laminated" them with packing tape. Painted the clothes pins in coordinating colors. Used a hole punch to make little circles. Wrote the first letter of the days of the week on the little circles. Glued them to the clothes pins. Decorated a background for the frame. Cut up crayon boxes and covered them with contact paper. Glued them to the frame.
 Darlin' glued the clothespins on for me, using Gorilla glue and clamps. Drying time was up. Took the clamps off. Three or four clothespins came off. Glued them again. Clamps and clothespins came off. "Roughed up" the surface of the frame with an emery board. Glued them once more. Drying time almost through. By this time the kitchen table was awash in papers, stickers, cookbooks, all manner of tape, glue, pens, markers and crayons.
      Darlin' was sitting at the table reading. I took his coffee cup (with about 1/4 cup of coffee in the bottom) to refill along with mine. And then, before I got to the counter, the-dog-walked-under-the-table, bumping a clamp with her back. OOOOHHHH YYEESSSSS..... that's right. In a panic, I lunged for the frame (which was only about 8in away) It hit the chair, coffee spilled all over it. Clothespins went flying.

  I just stood there, dumbfounded. I set the coffee cup on the table and just...walked away. I can't remember what I did next. But when I came back, Darlin' had sopped up the coffee, glued those dang clothespins, once again, back on the dang frame, and was playing in my paper stash. You see, I didn't have any pretty paper left in the colors I picked for my project, and if you remember, the closest place to get scrapbook paper like that was 65-70 miles away. I was done. Who cares anymore! I thought. I will eat PBJ and Ramen noodles for the rest of my life! I poured a cup of coffee and sat next to him. He showed me the new background he made. It was way better than the one I originally made! I LOVED it! *side note-Joe is quite secure in his masculinity, 100% lol*

 And finally, here it is:


The stickers above the type writer read "Acts 2:46" which says "And they, continuing daily with one accord in the temple, and breaking bread from house to house, did eat their meat with gladness and singleness of heart,"
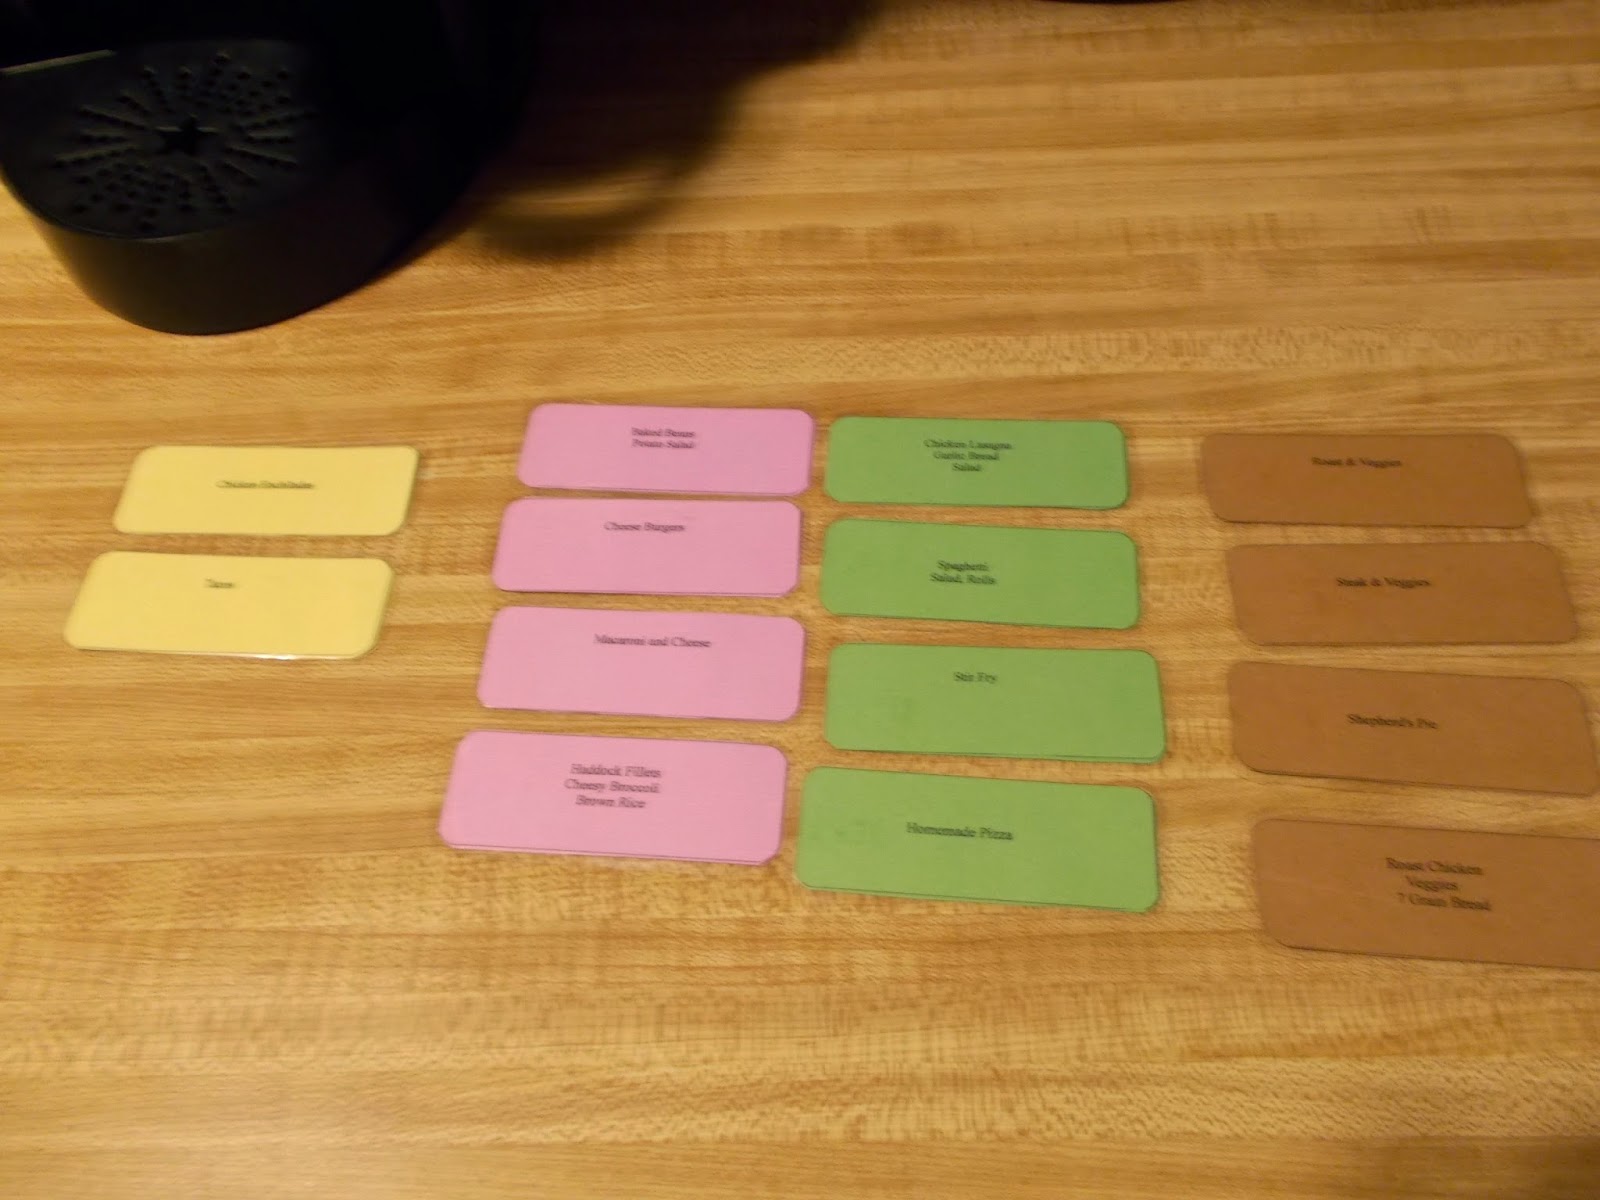
 Yellow meals/dishes are Mexican, pink is American, green Italian, and brown 'home/country style'
 On the front, is the 'menu'
 And on the back are ingredients that I might not normally have on hand, and usually have to add to my grocery list. On the bottom left corner I have the reference of where to find the recipe. Shown here, it is in my big binder, under tab four.

 Some cards do not have any special recipe I follow. This one I just cook the brown rice (about 45-60 minutes) and follow the directions for the fillets on the box. Boiling/steaming broccoli is nothing special. This is an example of a simple-to-put-together meal for busy nights.

 Others have several 'special' key ingredients I want to be sure to add to my grocery list.

 Cards like this one here have vague descriptions because of the flexibility of the side dishes. You could have mashed potatoes and green beans one night, the next time brown rice, glazed carrots with onions, etc. you can even switch between roasting in the oven, rotisserie (if you have one) or crock pot (my favorite!)
  The recipe for the bread is under tab two in the binder, and the cooking temperatures and times are in another cook book I have.
 This is what it looks like with the menu for the week planned out.
 Once I have used a card, I put it in the right box, until I've used nearly all of them. Then I put them back in the left one and start over.


What I have learned:  *Do not paint the bottom of your clothespins, the paint will stick to the glue and not to it.
* Use a wooden frame. The plastic one was so smooth the glue didn't stick to it well, we had to scratch texture into it. Also, Gorilla glue won't stick to some types of plastic because of what it is in it, and that must have been what my frame was made of. My frame was 11''x14''

* Choose a frame with a flat edge. Darlin' had to use pencils to help hold the clothespins flat on the frame because it is rounded. A couple of times the glue stuck to the pencils too, and when we tried to get the pencils off, off came the clothespins too.
*Keep this project away from animals prone to ''gomminess".
*Have a very talented, loving and patient husband with an artistic flare help you out :)
*Drink chamomile tea and take yoga classes afterwards. Okay, maybe not. But it wouldn't be a bad idea. lol.

After all the aggravation, it is my favorite menu planning system so far. All the planning work is done ahead. I only need to choose which meals we will eat the following week, and flip the card over to add ingredients to my shopping list. I have more paper for the cards, and plan to add more meals when I have time. Right now there are 14 suppers, enough for two weeks and that doesn't count leftover days. I switch it up so we don't always have the same meal on the same day (pizza every Monday, etc) but you can certainly do that if you wish. I like to look ahead that week and see which nights would be better for easier dishes, and which ones I will have time to make more detailed ones.
   I also tried having 7 baskets ($1 each from Dollar Tree) and after coming home from grocery shopping I put the ingredients for each meal in their own basket and labeled it with an index card. Then, when I was ready to prepare supper, I simply took out the basket for that meal and got started. This was so I wasn't digging for cans of sauce and green chilies that went M.I.A under the deep, dark cabinets. The concept of it worked wonderfully, however, I have limited space to store our food, and when one or two baskets only had a couple items in them, I couldn't justify the waste of space. Everything else was so crammed that it defeated the purpose. If I had an actual pantry with better use of space, it would probably work fine. So for now, in this season of my life, that doesn't work for me. (The idea is from *interest too.)
  So for those of you crazy brave enough to follow suit and try it, I wish you the best of luck. For all the others, you may be wiser than you think lol.

Saturday, May 31, 2014

Raised Beds

Ain't I cool??
Enjoying the fresh air while everyone is outside
 Fooling around
 Natural homemade ''bug dope''
 About 1/8-1/4 cup olive oil, few drops of eucalyptus and citronella oils. If I had lemongrass oil I would have added that too. Stir it together and apply with hands in a thin layer. I used this on Big Boy. It really works! No deet needed!
 Shade, and bug protection
 He was singing to himself and showing off his belly, so cute!

 Raised beds out of hemlock, 4'x8'.
  Without the tractor this year, Darlin is making the beds for easier planting/maintenance. We do want/need to get another tractor soon!
 Faithful friend, enjoying the shade.
 Fresh air makes for good snoozing.
 Generous hens.
 Staining the chicken tractor/egg mobile
 What a day!