boots

boots
Farming Family

Monday, November 10, 2014

First Snowstorm Of The Year

Helping Mama make brownies!
 My little taste tester!
Having a snooze
 Started snowing/mix Sunday morning. All cozy in soft p.j.s and a comforter

Getting ready to watch "It's A Wonderful Life" with Mama and Daddy. Mmmm, popcorn!
 First time playing with snow...
 Monday morning...


 Snow drift up against the back door...


Time for breakfast! First time to bake goodies in the wood cook stove. Homemade cinnamon rolls! I found out where all the hot spots are in the oven! Lol.


Tuesday, September 30, 2014

Some Good Quotes

"The Secret to getting ahead is to get started."

~Mark Twain


"Someone is happy with less than what you have."

~Unknown

 Have a good day all!

Wednesday, September 24, 2014

Just like Daddy

Am I disturbing your reading Big Boy? What a face! This is one of my favorite pictures!


Fired up the ol' cook stove the other day. Made homemade granola and baked taters. 
Don't worry, that is glare in the picture, not smoke lol. 
 My first batch of homemade baked beans. Mmmm.
 Kicking back, jug in hand.


Friday, September 19, 2014

Greeting Autumn

Staring off with a fresh batch of squash doughnuts (Grampie's recipe) and pumpkin spice coffee.

 Hey toothy! What'cha doin??
 Bear season in Maine means wearing hunter orange.
 Foghorn Leghorn
 The chickens gobbling up their daily apples. They Love them!
 Homemade peanut butter dog treats. I remember making these a long time ago for my Aunt and Uncle's dogs for Christmas.


 Jackson is trying to figure out how Lefty Frizzle got in the radio.
 "Excuse me, we have a problem." Lol.
 A few decorations


s

Wednesday, September 17, 2014

Chicken Enchiladas


8 flour tortillas
3 boneless, skinless chicken breasts
1 16oz container sour cream
1 10oz can cream of mushroom soup
1 10oz can cream of chicken soup
1 small can green chilies (chopped)
1 small onion (diced)
1 8oz pkg. shredded Cheddar cheese
1 8oz pkg. shredded Colby-Monterey Jack cheese

Preheat oven to 375*. Boil chicken breasts and allow to cool, at least to room temp. In a large bowl mix sour cream and soups. Take 1/4 of mixture and set aside. Add to large bowl onion, chilies, and cheddar. Shred or cube chicken and add to large bowl. Place about 1/2 C. of mixture on middle of tortillas and roll up. Place in a glass pan. Cover with the mixture that was set aside, coating all the edges. Sprinkle the top with the Colby-Monterey Jack. Bake for about 30 minutes, until cheese is golden.


* The picture was taken the day after I made these. They look better fresh, I just forgot to get a picture. Also, I made three pans of them (for company) but only had two glass ones. If you bake these in a metal pan, the bottoms of the tortillas will be tough and chewy, at least mine were. :)

Tuesday, September 16, 2014

Homemade Macaroni and Cheese

I've adapted this cheesy recipe from one given to me on my 14th birthday. It is creamy and cheesy, sure to be a hit with the family.

 1/2 lb. macaroni, cooked. (we currently like small shells)
4 T flour
3/4 tsp salt
1/2-3/4 lb shredded cheddar cheese
2 tsp worcestershire
4 T butter
3 cups milk
1/4 tsp fresh ground pepper

*Cook pasta. Melt butter in a pot, stir in flour, salt and pepper. Slowly add milk, stirring until it thickens. Add cheese, stir until melted and blended well. Add worcestershire sauce. Pour over pasta, mix together and serve. A few strips of bacon makes a nice addition. Fry and drain before adding to macaroni. Makes enough for 2 (and a half, lol) people with enough leftovers for another meal.

Monday, September 15, 2014

Homemade Furniture Polish: Frugal Living Series

After using the last spray of Pledge, I set out to find a good recipe for homemade furniture polish online. Of the ones I looked at, I liked the sound of this one the best, so I tried it. Unfortunately, I can't remember where I found it, so all I can say is that I did not come up with the recipe. I love it! It works great, smells great, and I had everything I needed to make it in my cupboards. And so here it is:

HOMEMADE FURNITURE POLISH
2 T. Olive Oil
1/4 C. Vinegar (I used apple cider vinegar)
1/4 t. Lemon Juice

*Mix up and pour into a spray bottle. Because the oil won't mix with the vinegar, I just shake it a little right before I spray it  You might want to test it on an inconspicuous spot first, but I haven't had any problems.

 Happy polishing!

Thursday, September 11, 2014

Wednesday, September 10, 2014

~Frugal Living Series~ Homemade Cleaners

Cleaning is something that we just have to do. It removes dirt and germs and in doing so, creates a healthy home environment, not to mention a nice looking one. I started making my own cleaning products for two reasons:
*it costs less
*less harmful chemicals

*All purpose cleaner*
1 part water
1 part vinegar
-mix together in a clean spray bottle. Cheap and effective. I like the smell of vinegar too!

*Glass cleaner*
-the same as all purpose. It works great on glass!

*Disinfectant*
1 part 70% rubbing alcohol
1 part water
-mix in a spray bottle. -use on points of contact (door knobs, light switches, etc.) and after preparing raw meat use on the counter. Also you can use it on baby's highchair tray, walker tray, swing, etc.

*Bathroom cleaner*
-I use the all purpose, and the disinfectant. For the shower, I spray it down with the vinegar and then use an off brand ''Miracle Eraser". So far I have not had any trouble getting soap scum and hard water off the shower this way. I cut the erasers in half, and it is still big enough to do the whole shower and tub. For the toilet bowl, I'm still using Lysol cleaner that I bought a while ago. After it is gone, I plan to go with the vinegar and see how that does.

*Dish soap*
-I've almost finished the last of my dish liquid (store brand). And then I want to try this recipe:  www.diynatural.com/homemade-dish-soap/
You don't have to use the essential oils, they are just for smell. However, Tee Tree and peppermint oils are known for their natural antimicrobial properties.

Laundry soap will be in my frugal laundry post.

Happy cleaning!

~Frugal Living Series~

Here is the series I mentioned that I wanted to do. I was brought up in a large family where I was taught the value of saving hard earned money and stretching a dollar as far as it will go. And while I always knew there was wisdom in that, I didn't wholeheartedly do my best to save money and spend wisely when we first got married. I mean, I tried, but if I wanted the good smelling laundry detergent, I spent $11.00/bottle for it. (I don't care what the companies claim, I've never been able to get 60 loads out of one bottle). And in the early days, I tired to get as much ''organic'' food as I could, sometimes spending upwards of $100.00/week for two people! I know, I see my folly now lol. The ''organic'' thing didn't last long, because it was so much money, and foods like fresh veggies and milk products you can only get a week or less out of them before they get slimy or sour. We were pitching bad food and of course I felt guilty. I soon revised my shopping habits. **quick note about ''organic''** While organic is good, it means FEWER pesticides, not necessarily NO pesticides on crops. Organic veggies are better than organic meat, egg and milk products for this reason: you can still keep diseased animals in filthy, crowed facilities, throw organic grain at them and sell the products at the high organic prices. Personally, I think it is much better to patronize a small, local farm that is dedicated to raising healthy animals in a more natural environment than pay big bucks for ''organic'' food that was trucked 1,000 miles or more from its original location. Even if they feed their animals non organic grain. I'm not just saying that because we farm, but honestly, it makes more sense.   

Anyway, sorry about the hippie rant. Where were we? Oh, saving money, right. So, I really became aware at just how much we were wasting money as a family when while I was in labor for our first child, my husband got a call notifying him about a layoff at the mill. Great. Perfect timing. He did get laid off, one of 200 something workers. We thank God that we had recently bought a skidder to cut wood off our land to sell. He has been cutting wood for nine months now.
  And so my journey to frugal living started, full speed ahead. I'm learning a lot as I go, and some months I do better than others, but I'm striving for ever increasing improvement. I invite you along with me on this journey. Even if you're not in the same situation as we are, maybe you could join me to spend less in general.
  As our great grandmothers always used to say "USE IT UP, WEAR IT OUT, MAKE DO, OR DO WITHOUT."    

Saturday, August 23, 2014

Meal Plan Review

***********READ THIS POST IN ITS ENTIRETY BEFORE  DUPLICATING FOR
YOURSELF***********   I don't want any hate comments, don't say I didn't warn you...Lol

On my quest for better meal/food/money/sanity management, I thought I'd look on *interest (yes, it is now considered a swear word in our house!) for some fresh ideas. He,he. If only I could go back and tell that poor, little, unsuspecting me what lay ahead. I came across this woman's post/pin: http://thecreativemama.com/?s=menu+board
  All fine and dandy. I thought "Gee, I could make that. It doesn't look too complicated." *snicker*
I bought a frame. I bought lovely colored paper and stickers from the craft store (which, by the way, is about 65-70 MILES away from my home!) Over the span of about one week, I jotted down recipes I wanted to use, where to find them, what category they belonged in and then color coded them. Then, I had to figure out how to make the menu cards on the computer. Glued the fronts and backs together, ''laminated" them with packing tape. Painted the clothes pins in coordinating colors. Used a hole punch to make little circles. Wrote the first letter of the days of the week on the little circles. Glued them to the clothes pins. Decorated a background for the frame. Cut up crayon boxes and covered them with contact paper. Glued them to the frame.
 Darlin' glued the clothespins on for me, using Gorilla glue and clamps. Drying time was up. Took the clamps off. Three or four clothespins came off. Glued them again. Clamps and clothespins came off. "Roughed up" the surface of the frame with an emery board. Glued them once more. Drying time almost through. By this time the kitchen table was awash in papers, stickers, cookbooks, all manner of tape, glue, pens, markers and crayons.
      Darlin' was sitting at the table reading. I took his coffee cup (with about 1/4 cup of coffee in the bottom) to refill along with mine. And then, before I got to the counter, the-dog-walked-under-the-table, bumping a clamp with her back. OOOOHHHH YYEESSSSS..... that's right. In a panic, I lunged for the frame (which was only about 8in away) It hit the chair, coffee spilled all over it. Clothespins went flying.

  I just stood there, dumbfounded. I set the coffee cup on the table and just...walked away. I can't remember what I did next. But when I came back, Darlin' had sopped up the coffee, glued those dang clothespins, once again, back on the dang frame, and was playing in my paper stash. You see, I didn't have any pretty paper left in the colors I picked for my project, and if you remember, the closest place to get scrapbook paper like that was 65-70 miles away. I was done. Who cares anymore! I thought. I will eat PBJ and Ramen noodles for the rest of my life! I poured a cup of coffee and sat next to him. He showed me the new background he made. It was way better than the one I originally made! I LOVED it! *side note-Joe is quite secure in his masculinity, 100% lol*

 And finally, here it is:


The stickers above the type writer read "Acts 2:46" which says "And they, continuing daily with one accord in the temple, and breaking bread from house to house, did eat their meat with gladness and singleness of heart,"
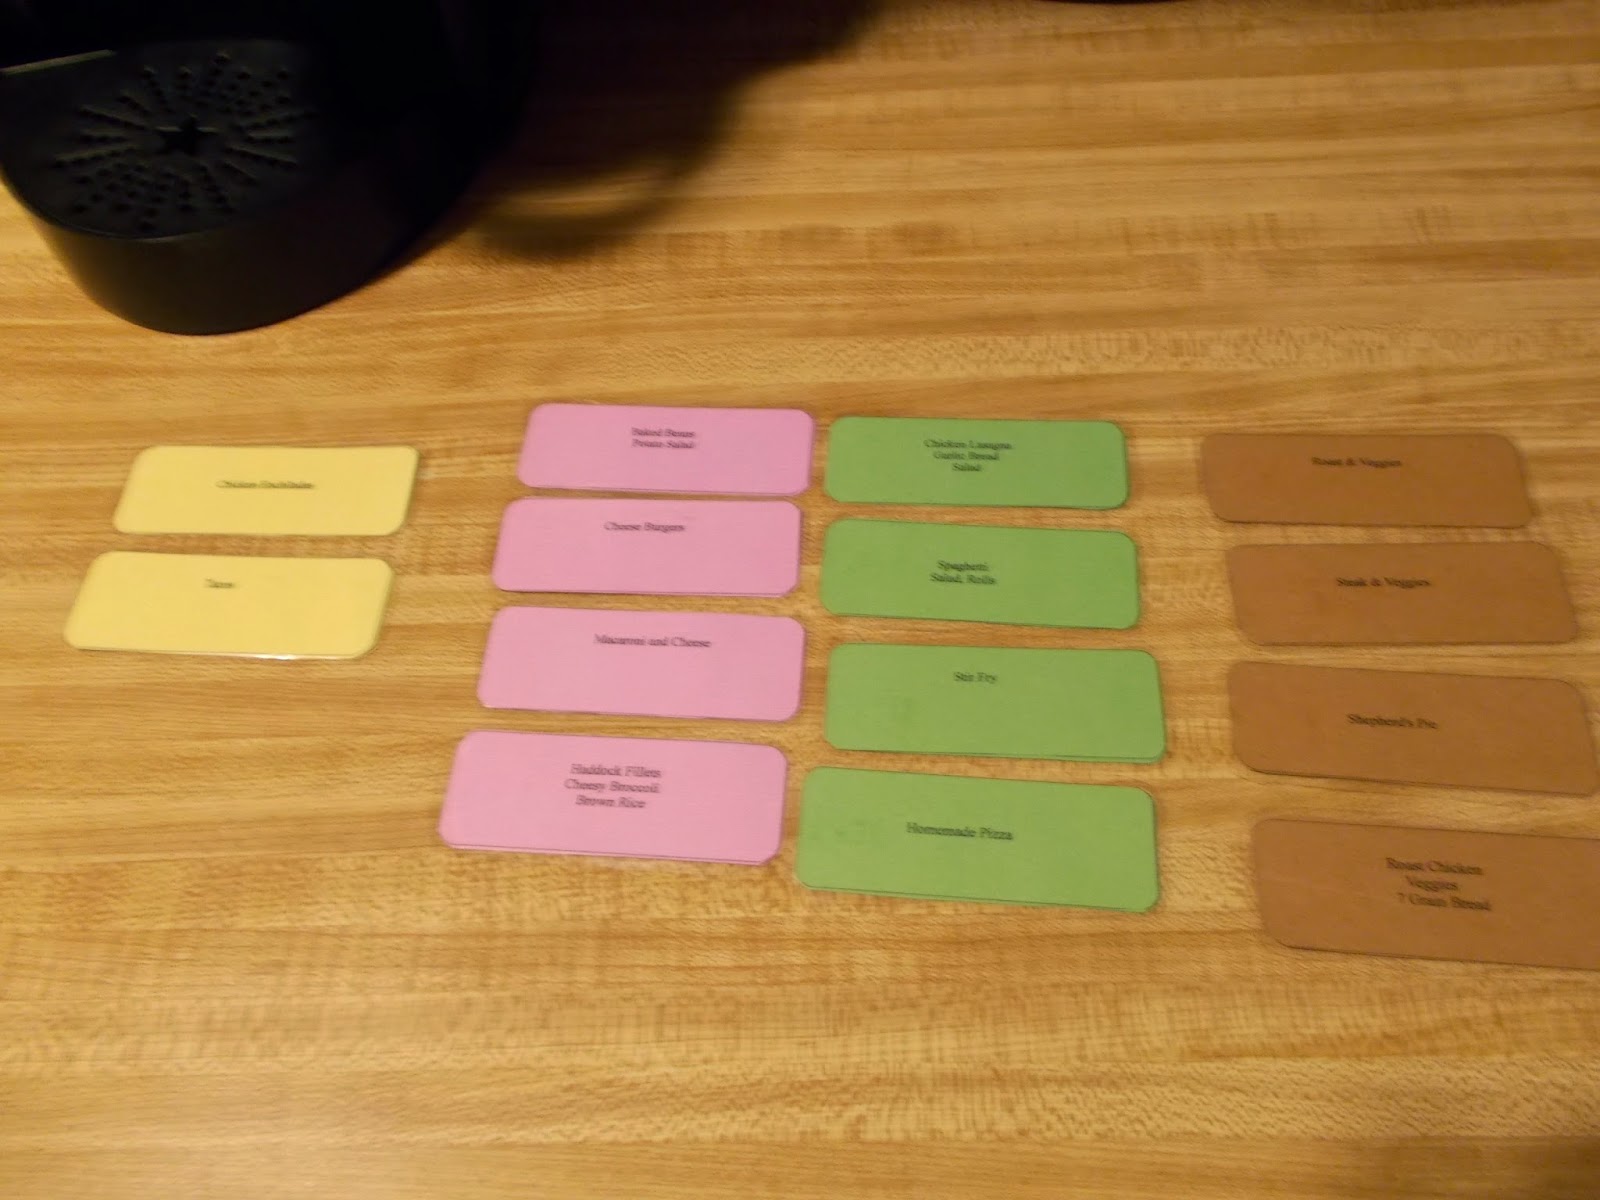
 Yellow meals/dishes are Mexican, pink is American, green Italian, and brown 'home/country style'
 On the front, is the 'menu'
 And on the back are ingredients that I might not normally have on hand, and usually have to add to my grocery list. On the bottom left corner I have the reference of where to find the recipe. Shown here, it is in my big binder, under tab four.

 Some cards do not have any special recipe I follow. This one I just cook the brown rice (about 45-60 minutes) and follow the directions for the fillets on the box. Boiling/steaming broccoli is nothing special. This is an example of a simple-to-put-together meal for busy nights.

 Others have several 'special' key ingredients I want to be sure to add to my grocery list.

 Cards like this one here have vague descriptions because of the flexibility of the side dishes. You could have mashed potatoes and green beans one night, the next time brown rice, glazed carrots with onions, etc. you can even switch between roasting in the oven, rotisserie (if you have one) or crock pot (my favorite!)
  The recipe for the bread is under tab two in the binder, and the cooking temperatures and times are in another cook book I have.
 This is what it looks like with the menu for the week planned out.
 Once I have used a card, I put it in the right box, until I've used nearly all of them. Then I put them back in the left one and start over.


What I have learned:  *Do not paint the bottom of your clothespins, the paint will stick to the glue and not to it.
* Use a wooden frame. The plastic one was so smooth the glue didn't stick to it well, we had to scratch texture into it. Also, Gorilla glue won't stick to some types of plastic because of what it is in it, and that must have been what my frame was made of. My frame was 11''x14''

* Choose a frame with a flat edge. Darlin' had to use pencils to help hold the clothespins flat on the frame because it is rounded. A couple of times the glue stuck to the pencils too, and when we tried to get the pencils off, off came the clothespins too.
*Keep this project away from animals prone to ''gomminess".
*Have a very talented, loving and patient husband with an artistic flare help you out :)
*Drink chamomile tea and take yoga classes afterwards. Okay, maybe not. But it wouldn't be a bad idea. lol.

After all the aggravation, it is my favorite menu planning system so far. All the planning work is done ahead. I only need to choose which meals we will eat the following week, and flip the card over to add ingredients to my shopping list. I have more paper for the cards, and plan to add more meals when I have time. Right now there are 14 suppers, enough for two weeks and that doesn't count leftover days. I switch it up so we don't always have the same meal on the same day (pizza every Monday, etc) but you can certainly do that if you wish. I like to look ahead that week and see which nights would be better for easier dishes, and which ones I will have time to make more detailed ones.
   I also tried having 7 baskets ($1 each from Dollar Tree) and after coming home from grocery shopping I put the ingredients for each meal in their own basket and labeled it with an index card. Then, when I was ready to prepare supper, I simply took out the basket for that meal and got started. This was so I wasn't digging for cans of sauce and green chilies that went M.I.A under the deep, dark cabinets. The concept of it worked wonderfully, however, I have limited space to store our food, and when one or two baskets only had a couple items in them, I couldn't justify the waste of space. Everything else was so crammed that it defeated the purpose. If I had an actual pantry with better use of space, it would probably work fine. So for now, in this season of my life, that doesn't work for me. (The idea is from *interest too.)
  So for those of you crazy brave enough to follow suit and try it, I wish you the best of luck. For all the others, you may be wiser than you think lol.